In this post I am going to show you how to install the SPIN UP F12W-PRO Bicycle USB Charger Dynamo. It is pretty easy and the box comes with detailed instructions and necessary tools. What I want to share with you are some little tricks that will make the process even easier.
My wheel comes with radial spokes. I will suggest you wash the wheel and let it dry completely before installing the SPIN UP Dynamo.
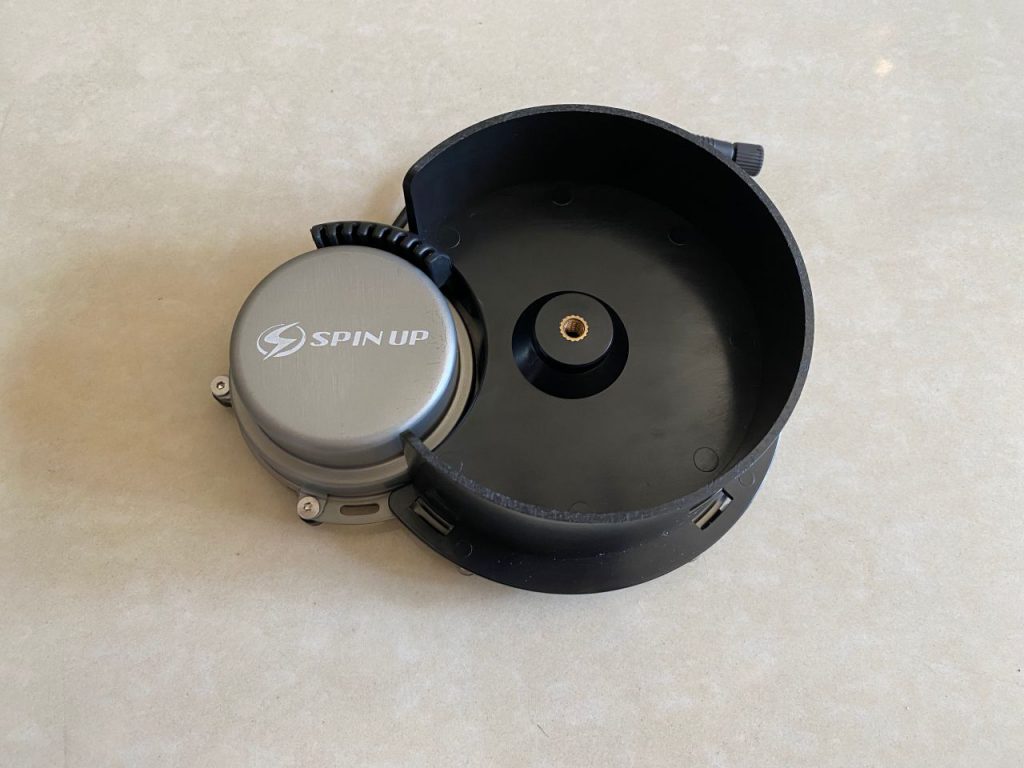
After completing the first part of the installation process, we should have the Dynamo securely mounted to the wheel with the little stripes holding the spokes. There should be at least 3 spokes being held, and spaced evenly, to the moving ring of the Dynamo. In my case, there are 10 spokes on each side of the wheel. 3 spokes should be enough but I have used 5. When rolling over the rumble stripes, the bike will usually rattle very violently. I want to make sure the Dynamo is secured.

Step 1. Get your wheel, Dynamo, and tools ready

Step 2. Attached the Dynamo to the black stand holder. It will ensure the wheel and the Dynamo lay stably on a flat surface while we work on the screws. It also makes sure the Dynamo’s ring is attached to the centre of the wheel.
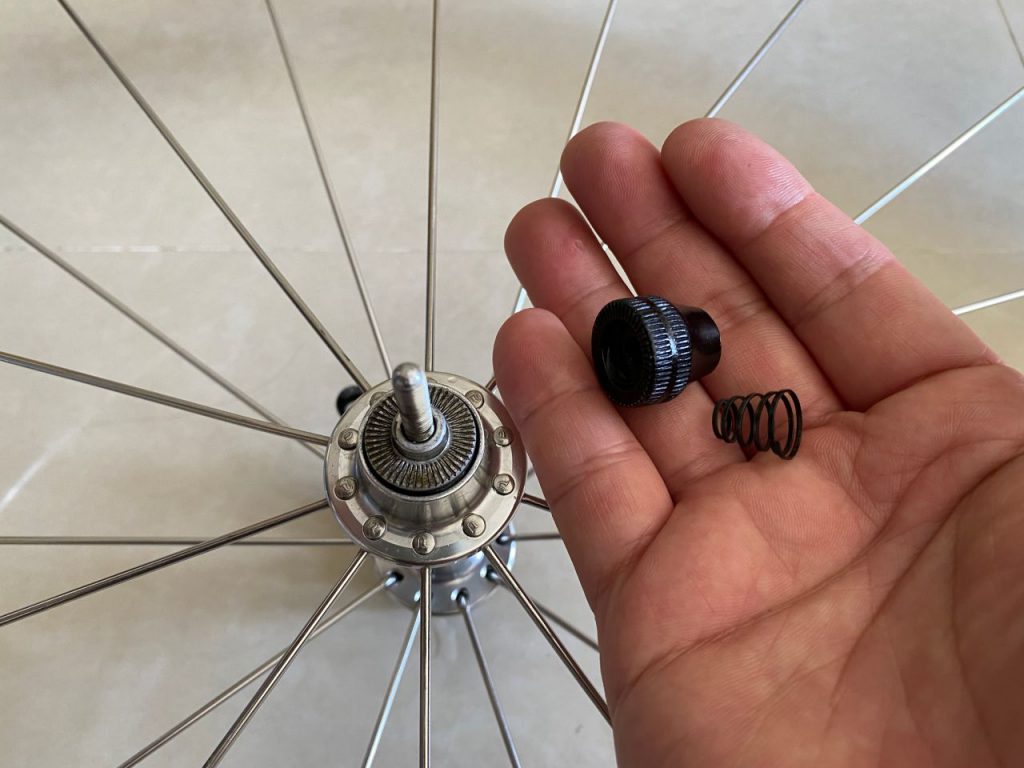
Step 3. Remove the quick release cap and conical spring completely from the skewer. Keep the conical spring and the cap in a safe place.
Step 4. Attached the Dynamo to the wheel. Screw gently the skewer into the black stand holder.


Step 5. Decide which spokes to be mounted and mark the screw holes to be used. Inspect if there is any gap between the spoke and the Dynamo’s ring. If any, put the little metal stripes between them until the gap is filled. This is important as we will later press the spokes to the ring with quite some pressure. If there is any gap in between, the spoke will be deformed or even cut. The metal stripes underneath are to protect the spokes. Take note of how many metal stripes will be needed to fill up the gap. In my case, I need only one piece of stripe for each gap.

Step 6. Unscrew the quick release skewer and remove the wheel. Fix the metal stripes on the dynamo’s ring with the screws provided as shown in the picture. Just insert the screws into the holes with a couple turns. Don’t fully tighten them yet. As observed in Step 5, I need one stripe under each spoke, and another one above the spoke. If you do this with the wheels on, you will find the stripes keep falling into the hole. It is easier to work with the stripes and the screws without the wheels.

Step 7. Put the wheel back on the Dynamo and screw the quick release skewer gently into the stand holder until the metal stripes underneath are pressed against the Dynamo’s ring. Make sure there is one spoke on each stripe.

Step 8. Fix both ends of the top metal stripes to the Dynamo’s ring. Again insert just a couple turns of the screws.

Step 9. The stripes are now held in place and ready to be tightened. We want the pressure evenly applied to the ring. So, tighten each screws only 2 – 3 turns and then switch to the next one. Then when it gets harder, make a quarter turn one by one.

How tight should it be? The metal stripes should be bended, forming a curve as shown in this picture. They are made with soft steel and are designed to be maneuvered like this.

Step 10. Remove the quick release skewer.

Step 11. Remove the stand holder from the Dynamo. Remember: don’t grab the Dynamo and turn the wheel, and don’t hold the wheel by the Dynamo. Otherwise, it will be thrown off-center.

Step 12. Put the quick release cap and the conical spring back on.

Voila! Now we have finished part one of the installation process, let’s get the USB charging unit ready and move on to part two. Here are the components included.

Step 13. Put the front wheel back to your bike, the usual way.

Step 14. Use the cable tie to hold the Dynamo to the fork really tightly. So tightly that even when the bike rattles on uneven roads, the Dynamo rattle with fork as one. Do not tie the spoke to the fork. This is not impossible as the spokes may be very close to the fork. The cable tie is releasable and reusable, which is convenient when you need to remove the front wheel.


Step 15. Connect the Dynamo to the USB charging unit. There are 3 pins.

Step 16. Run the cable to the handle bar; use the rubber bands provided to secure the cables.

Step 17. Fix the USB charging unit to any location you like. This is one possibility.

That’s it! Get your phone connected, start pedaling, and get it charged!
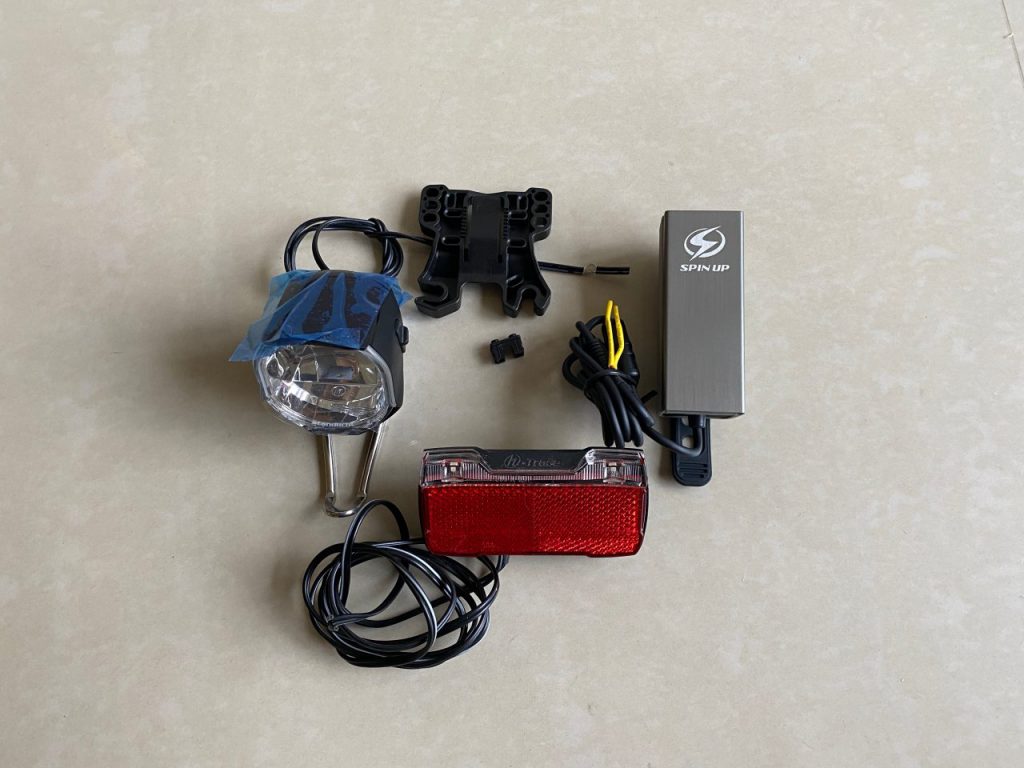
By the way, SPIN UP F12W-PRO is capable of powering the front and rear bike lights while charging your phone at the same time. The USB charger comes with a wiring branch (the yellow part shown in the photo above) for connecting the lights. A light set by Herrmans, H-flow and H-trace, can be bought separately on SPIN UP’s official site. I don’t have the need for powerful lights like this right now, as I don’t cycle much at night. A pair of rechargeable lights, which can be also be charged by the Dynamo, is good enough for me. I will write another post when I have the chance to try out the Herrmans light set.
For a complete visual guide, including connection to the lights, here’s a video clip from SPIN UP: